//go.ad2up.com/afu.php?id=662242

How to Solve the DWM errors on Windows 10 PC

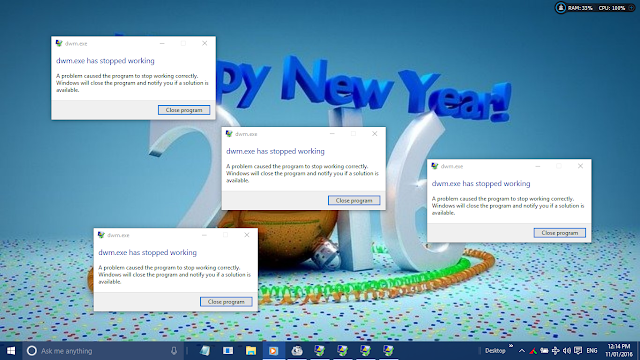
If you are a Windows 10 user and you are experiencing some four annoying dialogue boxes popping up like every two minutes after you have clicked on close. The error like DWM (Desktop Windows Manager) has stopped working.

Revo Uninstaller Pro Review

Revo Uninstaller Pro does not only remove undesired program from your computer, it also look for leftover files and registry files of the same program.

Learn about Picasa

Picasa is a free image viewer and image organizer. It is designed to aid the organization of photo for easy search of your photo. This program is owned by Google and it runs on major Operating Systems like the Mac OSx, Linus and your favourite Windows OS.

COPYING DIRECTLY TO YOUR WINDOWS PHONE 7, 7.5 AND 7.8

Windows Phone 7 Registry Edit for Windows PC to Enable Windows Phone 7 USB Storage.

SHARE FILE FROM YOUR PHONE TO YOUR PC USING SHAREit ON BOTH DEVICES.

No matter the size of your file or folder, SHAREit will transfer it from your phone to PC or PC to phone within seconds.

Showing posts with label Windows Packages. Show all posts

20150913

GET WINDOWS 10 UPGRADE FORCEFULLY.

Ever Wonder why you haven't got notification of Windows 10 upgrade on your present Windows?

The “Get Windows 10″ icon opens a dialog that hypes the upcoming Windows upgrade and determines your availability to receive it for free.

20150911

WINDOWS PHONE 7, 7.5, 7.8 AND ZUNE | SYNCHRONIZE YOUR MUSUC

Zune Default Logo

ZUNE

This is a Windows application designed special to make the Windows Phone Communication with a Windows PC. It is a very easy to use software with the option for the user to make modifications as to where you can back up your Windows phone.

ZUNE DISPLAY

Zune UI
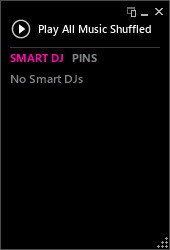
Mini UI

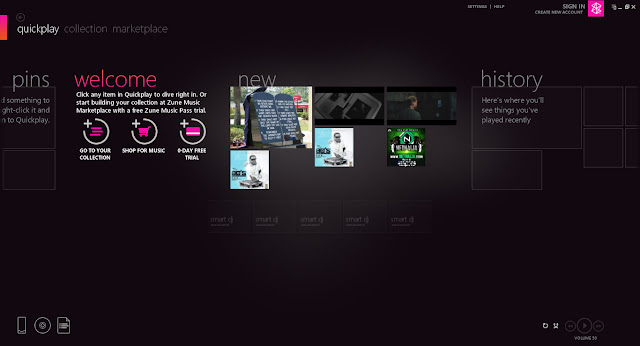
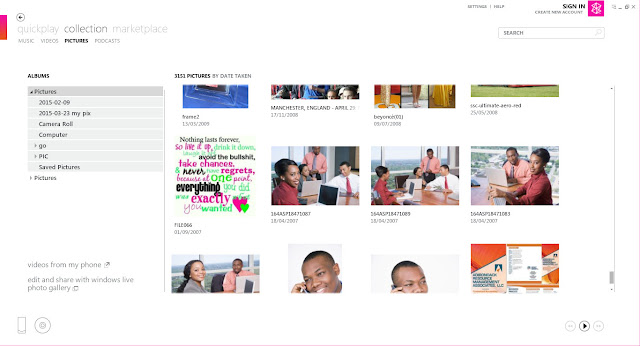
Zune has a very unique display. Its UI is something of a master class and well developed from scratch. The UI of Zune is much easier to navigate than to use the iTunes and you never get hooked as to find your Windows Phone and your Computer then your disk in the case you want to make a disk burn and also to create a playlist.

The Display is aero switching from one a section to another is found on the same screen just like on your Windows Phone Music and Video display.

The Switching is from Quickplay to Collection and to MarketPlace with each of them having their own sub-menu. With each, you can still find the Windows phone active icon, a Disk for Burning and a playlist icon creator.


When You click on the Windows Phone icon, the Windows PC  icon will now appear replacing the Windows Phone Icon. This will make all the navigation possible as you see all the stuff ranging from music, videos to Photos. Here you can synchronise your Window Phone manually.

ZUNE FUNCTIONS

If you did take your time to read this article properly, you will understand that we have touched some of the functions of this simple software that is designed solely to work with only with Windows Phone Device.

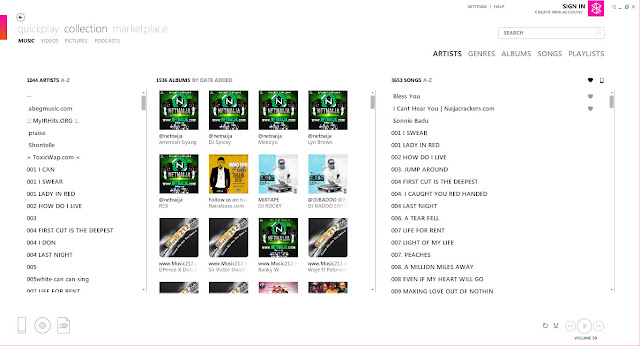
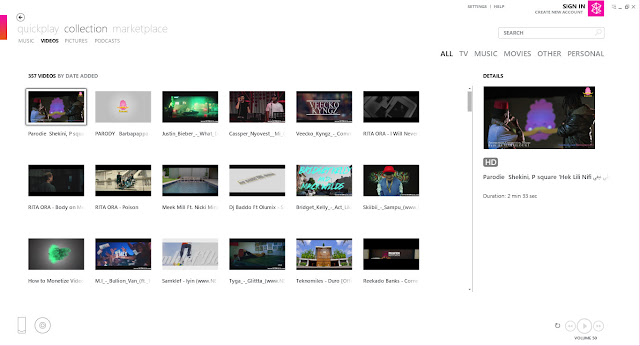
1. Zune Player: With Zune, you can play almost all format of Media. You can from explorer play any media of your choice or make it your default music/video/image viewer.
Zune Music
Zune Videos
Zune Photos

2. Zune Sync: Zune Synchronizes all or selected content in Windows PC and your Windows Phone. Its easy to synchronize. You may choose to select the item to be synchronize and do it after complete selection or simply drag them over to the Windows Phone icon and also synchronize your Windows Phone to your Windows PC.


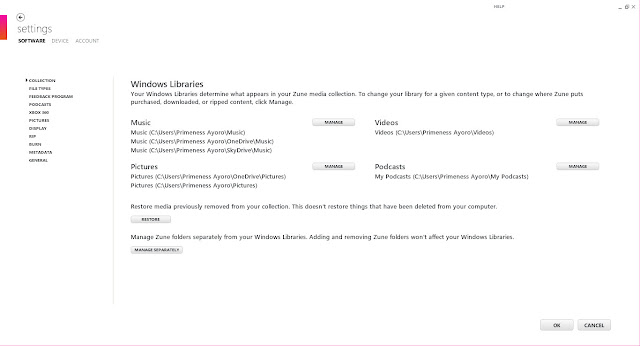
Zune Settings

3. Zune Account: Zune Account is easy to create. Once you have any Microsoft account like the old Hotmail, live, or the Outlook, you can use that to sign in or just create a new Microsoft account if you don’t already have one.

4. Zune Market: Zune use the Windows Phone Market Place and it is easy to navigate through. You can buy music, have a listen to podcast, etc.

5. Zune Burn: You can make a disk from Zune with a selected list of media created. Medias which you can create to is audio CD’s, Data DVD’s. It burns very fast with no error.

6. Zune RIP: Ripping you audio CD with Zune is no different from other CD ripping software. There are two format to which you can convert to including your Regular mp3

7. Zune Settings: The Settings can be modified easily as you would desire it to be. You can Change the Display. Your RIP format, audio quality. Burn Settings are also included among others. Your Windows Phone information can also be viewed with Zune. In here, you can Setup your Windows Phone in the Device tab where you can set the conversion settings of media and even change your device name. Create a reserved space for Windows app to be installed and also update your Windows phone from 7 to 7.8 as the case maybe.

Windows Phone can only be updated through this software and so much more can be done with is Software.

Zune does not just  Synchronize but a total do all of Windows phone 7 except for applications and other necessity and for users who do not have the luxury Bluetooth transfer.

If you feel you are not too satisfied with using Zune and want to use your Windows phone as a USB Stick or See the Drives  in other to make the more easier and quick transfer, click this link USING YOUR PHONE WINDOWS PHONE AS A USB STICK
For More information on ZUNE.

COPYING DIRECTLY TO YOUR WINDOWS PHONE 7, 7.5 AND 7.8

THE FRUSTRATION WITH WINDOWS PHONE 7

So many are frustrated with Windows phone 7. Imagine you still using Windows Phone 7 and cannot copy that interesting movie you got in your computer to you Windows Phone on time or the time it will take you to look for the music you would love to get to your phone with Zune. All this are the real limit to Windows Phone 7. 

So many users of Windows Phone have decided to migrate to Windows Phone 8 not because they it is more advance but because sharing is much more flexible.

Windows Phone 8 Bluetooth is so very much able to share files while that of Windows Phone 7 is just made to work with only headset just as iPhones.

The file sharing limitation is not just limited to that of Bluetooth but also to its drives not being found on your computer no matter how much you try.

In Windows Phone 8, you can easily do your transfer from your computer to your Windows Phone 8 or vice versa.

Why would you want to buy a phone in the same cost rang as that of an Android and that you can make transfer in diverse means like through its numerous file sharing apps to Bluetooth or computer or even allow a USB stick mount.

USING YOUR WINDOWS PHONE AS A USB STICK

To make media transfer easy for you as you use your Windows Phone, you just have to be a little patient with the means just as it can cause you a big flaw if you make a mistake. 
Some of you will not attempt this but some sure will because of the Failure or stress in transfer.

We shall go through a simple but complex process. To begin, get the Zune Software from here Install it on your computer. After the installation. Connect your Windows Phone 7 or 7.5 or 7.8 to the computer with your data transfer USB dongle. 

It will go through a series or recognition of your device. Just wait a tiny while as it won’t take any much time. The Windows Phone Drivers will be installed to your computer.

After it must have displayed on your Zune Screen by left Conner or Showing its screen with the Device name duly displayed.

Now, Close the Zune software and disconnect your Windows Phone 7 from your computer.

Go to “Run” from your Start menu if you are running on Windows XP service pack 3, Windows Vista, Windows 7, Windows 8, and Windows 8.1 but on Windows 10, you just have to right click on the Start menu or from the Windows Search bar. Type “regedit” on the “run” or the “Windows Search Bar” and tap enter on your Keyboard.

The Windows Registry Editor Window will now display on your screen. So all you have to do now just for you to follow this simple steps. I promise you nothing harmful will happen to your computer if you stay on the right cause but if you digress, I will not be held responsible for anything that happens to your Windows. So, stay on track but backup your registry by doing an export.

From the Registry Editor Window, you will find some four or five tiny folders on the left pane under Computer. Click on the arrow next to HKEY_LOCAL_MACHINE and follow its drop down to the arrow next to SYSTEM and also follow its drop down to CurrentControlSet and again follow the drop down to Enum and finally follow the drop down to USB. In a more descriptive Way, use this short form which I have put down to this >HKEY_LOCAL_MACHINE > SYSTEM > CurrentControlSet > Enum > USB

That short process can be followed through this image at bottom of this page.

You may not be able to find the part which you will modify on your own from the USB drop down. So, from you menu bar, click on edit and then find or simply tap on CTRL key together with F key from the search dialog box click type “ZuneDriver” without quotes and click next or tap on the ENTER key. It should lead you to the drop down of USB VID_045E&PID_04EC&MI_00 then to the drop down of 7&1e397214&0&0000 and to the drop down of Device Parameters and also to WUDF. 
In a more descriptive way, follow the short form which I have to put down as the following >VID_045E&PID_04EC&MI_00 > 7&1e397214&0&0000 > Device Parameters > WUDF. You have to ignore WUDF and click on Device Parameter. You can also get that from the image you can see at the bottom of this page, some of the numbers may be different from what to see but it’s the same.

Now, to the modification part.  To make modification to this Registry, double Click on that which you would modify at the right pane. Modification should just be 1 and 0.
   
Change ShowInShell from 0 to 1
Change PortableDeviceNameSpaceExcludeFromShell from 1 to 0    
Change EnableLegacySupport from 0 to 1
Change EnableDefaultAutoPlaySupport from 0 to 1
You may also Change PortableDeviceNameSpaceExcludeAutoPlay from 0 to 1

These above steps are the ways to edit your System Registry. You can use the image for a more concise understanding.

Windows Phone Registry Edit
If you don’t want to make the registry edit to your system by yourself for sake of the fear of not wanting to crash your system, you can visit WINDOWS PHONE 7 INTERNAL STORAGE ENABLER

20150506

HOW TO CONNECT A AD-HOC IN WINDOWS 8.1 WITH THIRD PARTY PROGRAM

 PROCEDURES TO USE A THIRD PARTY APPLICATION TO CONNECT TO A  AD-HOC


    -Download the application here

    -To connect, you need to first have to know its SSID or name and key or password.

CONNECT TO A AD HOC MANUALLY

PROCEDURES TO MANUALLY CONNECT TO A  AD-HOC

Windows 8 PCs are not Graphically shown as on other Windows. You can start

through the command prompt of your Windows PC. So, Lets Begin with the

Manual process of how to set it up.

 All you need to first have to know its SSID or name and key or password.
    -Now navigate to Network and Sharing center, right click the w-fi icon in the right hand corner.

CREATE AD HOC USING THIRD PARTY A PROGRAM

For third party applications. Download the Application Ad-hoc network creator windows 8/8.1
    -Run the application and Enter "2" to create your own wi-fi hotspot
    -Now Enter "1" to create a Hotspot
    -Enter SSID or Hotspot name

CREATE A AD-HOC NETWORK MANUALLY

PROCEDURES TO MANUALLY CREATE TO A  AD-HOC NETWORK

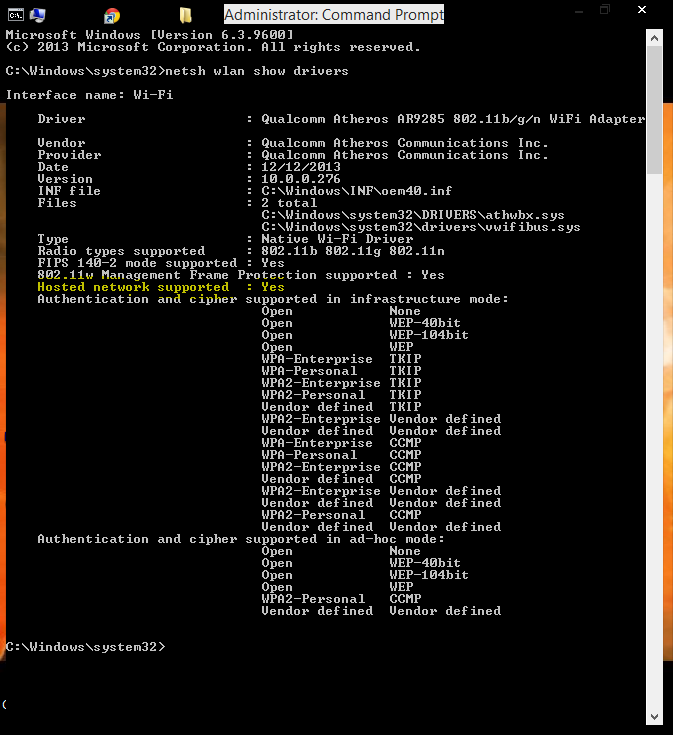
Manually, via command Prompt(cmd) as an administrator (Press Windows Key+X+A to Use as Admin) or right click on the the windows icon button on the far left of the Task Bar and select Command Prompt Administration.
    -Type in the following command to make sure your network interface supports hosted network   feature
     ->net wlan show drivers
     -Hosted network supported: YES