//go.ad2up.com/afu.php?id=662242

How to Solve the DWM errors on Windows 10 PC

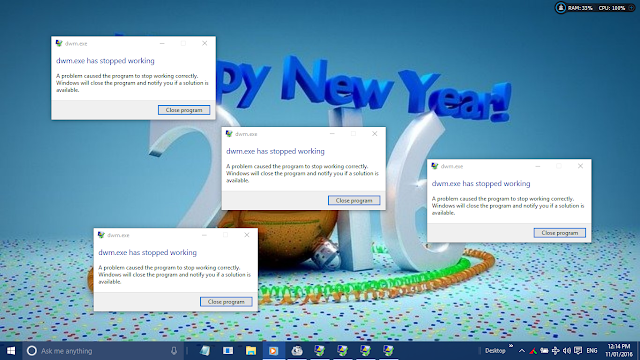
If you are a Windows 10 user and you are experiencing some four annoying dialogue boxes popping up like every two minutes after you have clicked on close. The error like DWM (Desktop Windows Manager) has stopped working.

Revo Uninstaller Pro Review

Revo Uninstaller Pro does not only remove undesired program from your computer, it also look for leftover files and registry files of the same program.

Learn about Picasa

Picasa is a free image viewer and image organizer. It is designed to aid the organization of photo for easy search of your photo. This program is owned by Google and it runs on major Operating Systems like the Mac OSx, Linus and your favourite Windows OS.

COPYING DIRECTLY TO YOUR WINDOWS PHONE 7, 7.5 AND 7.8

Windows Phone 7 Registry Edit for Windows PC to Enable Windows Phone 7 USB Storage.

SHARE FILE FROM YOUR PHONE TO YOUR PC USING SHAREit ON BOTH DEVICES.

No matter the size of your file or folder, SHAREit will transfer it from your phone to PC or PC to phone within seconds.

Showing posts with label Softwares. Show all posts

20160205

SHARE FILE FROM YOUR PHONE TO YOUR PC USING SHAREit ON BOTH DEVICES.

TRANSFER FILE OR ANYTHING WITH OUT CABLE OR BLUETOOTH BUT WIRELESS FILE TRANSFER

SHAREit make transfer very easy and fast between your PC and other Deveices or Phone to phone, Tablets.
Shareit makes transfer from PC faster and easy. Wonder how to transfer file like music or your installed program to  your Laptop for backup just as you use Xender which allows you to share anything on your device to another device with a very high speed making use of your wireless and no cable or removing of your microSD?

What is Shareit? It's a free file sharing app that works across multiple OS without using the internet but just a simple connection.

Now you can transfer music, photos, videos documents, file and others between more devices.

All you need to do is to get the app or program installed on your Phone, Tablets and PC to enable a successful connection and possible transfer.
Shareit Transfer can be done between almost all OS and Devices without internet connection or cable 
Open the Program in your PC if you are sharing to or from a PC, the create your own personal network by clicking on the click here below the phone image on the program then from the pop up window, enter any choice of character as your pass word or use the default "12345678" then click create and close the window. Click on the phone and will automatically move to a new window of QR Code will appear for you to scan with your phone
Then from the phone you either touch the send button, pick the content you want to send, choose the receiver and hit send! You will be connected to send files back and forth.

With a QR Code provided by the PC SHAREit, quickly pair your phone to your PC to start transferring files!

You can also connect to the PC by sweeping from the left and touch the "Connect to PC". 
Now Scan your QR code of the program from you computer and automatically join the network. connection may not work just follow the on screen instruction by manually joining the hotspot network from your PC and return to the app on the Phone. Then Bum, that is it. sharing may take place for any file since no file file resstriction.

With a QR Code provided by the PC SHAREit, quickly pair your phone to your PC to start transferring files.

"Transfer files, photos, videos, documents and more 
No matter the size of your file or folder, SHAREit will transfer it from your phone to PC or PC to phone within seconds. 
No need for WiFi, cables or mobile data charges, SHAREit will send your files easily and conveniently." 

20160127

Firefox added support push Notification to the recent 44 Stable Version

Mozilla Firefox
Mozilla has made a new addition to it Web browser. Mozilla Firefox 44 Stable Version has got an additional feature like the push notifation.

Yeah, yeah! Push notification. It's just coming to the browser giants for the first time. This means you can get notification from any website from your favorites websites like your Twitter, Facebook, or social networking sites, e-commerce sites and even from your email or any site that supports it. 

This feature can any ways be manage from your Firefox Option > Content and then notification.

This feature is not new to some other browsers as Mozilla has just decide to come to add it to Firefox. browsers like Chrome, Safari and opera has got this feature before now. So, it will be left with Microsoft to get it in-cooperated in to their new browser, the Microsoft Edge which actually lack a lot of features.

Other addition to Firefox 44 includes the  improvement on warning pages for certificate errors and untrusted connections, also enables H.264 video playback as long as you have a native decoder in your PC and enables WebM/VP9 video support on systems that doesn't support MP4/H.264. 

According to Techspot,
Developers that want to implement push notifications on their website can learn more by checking out this Hacks blog post.


20151119

WhatsApp Messenger -Taking WhatsApp with you | How to Use WhatsApp on web

www.whatsapp.com | How to Use WhatsApp on Web

Logo
WhatsApp Messenger
As we all know, WhatsApp Messenger has been just a smart phone application. WhatsApp was design for the sole purpose of cheap and quick messaging mobile cross platform instead of the expensive cost messaging then at it early Lunch. People can easily use a wireless network service or a premium data service which will definitely reduce or cost nothing since that subscription covers a variety of purpose not just WhatsApp as the cash maybe, though airtime was used in its early days even till since it takes less than 5KB for a 3page text.

WhatsApp was found in the year 2009 by two formal yahoo! staff Jan Koum and Brian Acton.

WhatsApp Early Days

WhatsApp was first lunched for the iphone in 2009 and was then incorporated as WhatsApp Inc., in February 24, 2009. In that same year, WhatsApp growth was very fast so also, investors. WhatsApp then introduce the Verification SMS which will be sent from your phone at a little cost as that will now covers for the the service. This was done to actually slow down the growth as the number of staff may not match the growth.

Gradually the Image sending was introduced to WhatsApp to cover for the use of the MMS since it take very small size of picture. Later on as WhatsApp surpass the normal text message or Multimedia Messages, they Added the Voice and Video message feature and the and in the read receipt feature which allow one to know if their message has be read and in January 2015, WhatsApp added the Voice Calling Feature.

WhatsApp growth in Smart Phone

In November 2009, was when WhatsApp was actually launched officially and was exclusive to iPhone App Store and it later came to the BlackBerry OS in January 2010 and The Symbian OS in May 2010 and in August that same year, it was introduced to the Android OS. It was later in August 2011 in came to Nokia S40 and in September that same year it got to the Windows Phone and the BlackBerry 10 OS in 2013. It was later introduced 2015 to the Samsung's Tizen OS. Some unofficial Port was was released for other OS that don't have the luxury to get the official version.

WhatsApp Acquisition by Facebook

Facebook announced it was acquiring WhatsApp for US$19 billion on February 19th, 2014. This lead to a turn around as critics flew in the air.

WhatsApp Web
WhatsApp Messenger
WhatsApp Web

WhatsApp web was officially introduced in January 2015 by Jan Koum on his facebook page that:
"Our web client is simply an extension of your phone: the web browser mirrors conversations and messages from your mobile device—this means all of your messages still live on your phone".
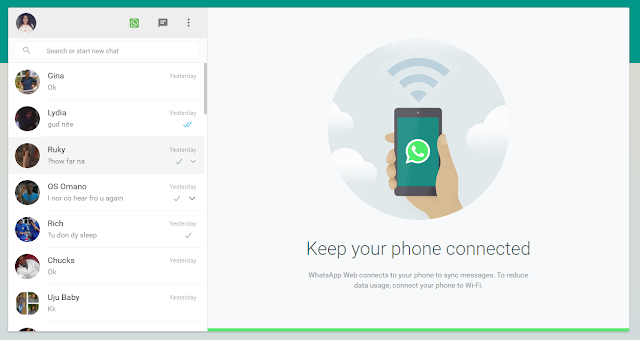
 The WhatsApp Web version is an extension of the WhatsApp in your device, though it looks very similar to the interface of an Android tablet's. This means that WhatsApp Messenger on your device is simply left any where your allow as you use your PC while you surf the net. No need to bother yourself with every ping of WhatsApp message receive. The Web version for PC uses the Web client and so the WhatsApp on your device must be connected for the Web version through your browser to work effectively. This may consume data from both device. I will advice you use a Wi-Fi network or a Premium Subscription.

Your contacts and all your recent chats will be available once you have successfully activated the WhatsApp Web.

How to Activate the WhatsApp Web and WhatApp Messenger

 One must have the WhatsApp Messenger installed and registered with a Phone number, activate it with a verification code recieved in that same registered number.


The WhatsApp application will automatically compile all the contacts or phone numbers from the address book of your device and then compare it with the WhatsApp central database of users to automatically add matching registered contacts to the your WhatsApp contact list so as to avoid the find and send friend request.

So also, this step is not the same in the Web Client Version since it only mirrors your Device WhatsApp but its very efficient.

WhatsApp
WhatsApp Web

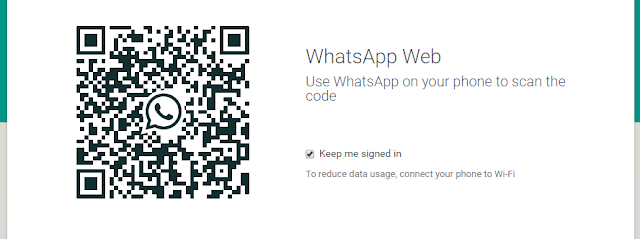
To get started With the PC Web Activation, simply click the WhatsApp Web link to begin. From the list of Tabs, Click the WhatsApp Web Tab, then scroll to the bottom of the page and see how to activate it with your Device by Scan the QR Code. It will automatically Scan after you must have selected WhatsApp Web from your device WhatsApp menu and that will open the WhatsApp Web on your Browser. Make sure you tick the keep me signed in if not already ticked unless you want to sign manually each time.

There are web browser extension which you can download that will enable swift notifications if you didn't open the page.
WhatsApp
WhatsApp Cross Platform

To get the WhatsApp Messenger for your Device, you may want to click on the following links bellow to Download them form your Device respective Stores.

20151103

IObit Uninstaller | Review

The Little Super Uninstaller

IObit Uninstaller Logo
The IObit Uninstaller is a very powerful application Remover with one of the world safest means of application removal tool.
IObit Uninstaller is designed to maintain the way applications are removed from one’s System as to their location in the System. So, when uninstallation begins, it analyses the application to the depth and make sure conflicts with other programs in the same directory are not affected.
This application is so wonderful and its work is basically on uninstallation and removal of Applications and file from one’s Computer System Totally except that it does not possess the other operational functions of VS Revo Uninstaller.

IObit Uninstaller | How it Works.

It has one of the simplest interface of all installers you can find anywhere and it is attached to the Default Windows Uninstaller Programsand features Like a button.
When launched directly from click on the Desktop icon or from the Start menu or from the added button on the Default Windows Uninstaller. It will display this unique User Interface with the Menu on the left while every task is carried out on the other part of the entire display screen.

Uninstall: All that is done in this program is to uninstall. By default, the Program menu is activated showing all the user installed programs on the system with their details like the size, Date installed and the Version of the Program installed.
From here, all the programs can be removed from the computer easily without stress on one’s part depend on the settings given to it.
Uninstallation can actually pass through these simple four steps like clicking on the trash can after the program name just before the program's size and version.
The second method is to just select the program then click on the round big uninstall button at the bottom of the 'All Program' menu list of your IObit uninstall.

The third is known as the batch uninstall where one have to uninstall series or certain numbers of programs sequentially by simply clicking on the batch uninstall at the left top of the 'All Program'  menu display section.

And the last is the method of Uninstalling in the IObit Uninstaller is the IObit force Uninstaller which allows one to make a very thorough scan by either typing the exact name or a part of the program and also dragging the program icon from the desktop or anywhere it is on the system to the dialogue box of force Uninstaller of the IObit Uninstaller. Then click next or OK to jump to what its design to actually do.

In all this process, the uninstallation dialogue box of the IObit Uninstaller will begin with the process of asking whether to create a system restore point.  It actually very nice to create a system restore. Point in the case of some thing happens to your computer and your need to restore to a previous restore point and it gar from the particular date.  You know what that means if you do that, lose all changes made after that date apart from user data.

After the restore point has been successfully created on the system, then it will move to the next section of the dialogue box Uninstallation Program and the built in on Uninstaller for that program will pop up and used to uninstall program from the system so after that, the IObit Uninstaller Uninstall at ion dialogue box will shift to the section where it will allow for the deletion of remainder of the program if there is actually any left over after the Uninstallation and scanning. This. Method can be done actually by clicking next and finish or simply select the check box at the bottom left the dialogue that says don't ask for next, so one Uninstallation will be down automatically except for the program's defaults.
From the Programs menu these other options for a quick find of programs van be seen. Just as Recently Installed programs, Large Programs, Infrequently Used Programs. All those options use the same methods of uninstalling.

TOOLBARS AND PLUGINS:  IObit uninstaller actually allows for the Uninstallation of those troublesome Toolbars in your Web browser and those annoying plugins that actually pops up with ads everywhere on your browser and there by consume more of your band width.  This is easily done by clicking on the Toolbars and Plugins menu, then, the All Toolbar s and Plugins option will be opened by default. Now one can clicking on the trash can to remove the annoying toolbars and plugins.
Other option that can also be found. Under this menu are all the browser type found on your System.

WIN MANAGER: The Apps option is just for Windows 8 Windows 8.1 and Windows 10 only because of the Windows Universal Apps. This option is actually not available or working in Windows earlier than these. Here, U can do a batch uninstall or simply use the trash can by the app or select the app the click on the large round install button.

The Start-up options are also another in Win Manager as it will enable you to find Programs that auto runs on Windows start-up and tend to slow your start up time, so, you can therefore stopping the app by Disabling them or Uninstalling them from the Disable/Enable option or the trash can to remove or Use the big Uninstall button..
The Process option is just a simple way of stopping programs End Task which are taking up your system resource or not responding and so tend to slow down the system or cause lag. You can also uninstall program process from this option.

The Windows Update option allows you to find the recent update done to you PC from the windows server and allows you to uninstall any update that you did and affects the operation of your system either by Batch Uninstall, from the Trash Can or the big Round Uninstall Button.

Tools menu: This menu consist of four options which are:
Clean-up Residues requires one to scan the system from the big rounded scan button for junk files, residues of applications during operations by the User or left over of programs Windows Patch cache from Updates and also browsers download that are actually taking up space. Once the scan is down completed, the big rounded scan button will now change to clean. So, now you can clean.
Uninstall History option is does no other thing than just to save the logs shows the state of uninstall. If you have a pending uninstall leftover scan to do, it will state.

The File Shredder option on IObit uninstaller allows you to make an unrecoverable delete from your system. Like when you delete something from your Computer, it actually did not delete it remains on the disk due to system performance and thereby leading to finding it with a recovery tool but may not be with that same name or none since the name will be deleted even when the disk is formatted, it may still be recovered. So, Shredding will allow you to delete the data permanently from your disk. To do this with IObit Uninstaller, Just select the File Shredder option from the Tools Menu and either drag the file or whatever you want to shred into the space provided on the right or simply click on the add file or add folder options and select from the directory where this file is Located and click on Open or OK to select. Then, click on the Big rounded Shred Button. That’s should be all.

The Windows Tool option is built and designed for those that finds it difficult to find the Windows Administrative Tool. You can easily get all from this option from the Tool  menu.

You can download the setup from the direct link

20151011

REVO UNINSTALLER PRO REVIEW

REVO UNISTALLER PRO

REVO UNINSTALLER PRO 3.1.4
Revo Uninstaller Pro by VS Revo Group Ltd. It is probably the best uninstaller program out there. This uninstaller is a third Party Utility software and that it program functions are nearly unlimited, Quick and Easy to understand User Interface.
Revo Uninstaller Pro does not only remove undesired program from your computer, it also look for leftover files and registry files of the same program.
One very good thing to know about Revo Uninstaller is that it does not eat into your System resource like running at the background of your Computer and it will not take up space in your RAM or Clock your Processor when not lunched but it can actually be set to Autostart.
Revo Uninstaller Pro can only load into your RAM if you lunch it and will only function if you execute a task with it. Your system will continue to run smoothly if you it is even running and performing a task. It will not cause any lag to your system.

How it Works/User Interface

Revo Uninstaller Pro when launched, it has a very simple UI but first will require an administrative privilege to function for a successive launch else it will not. It will display the All Program Tab by default. This display has three basic view of Icons, List and Details.
Revo Uninstaller has four (4) default Bars apart from the default Windows Applications Title bar. So, these bars are the menu bar, Command bar Discription bar and Status Bar. It have other bars like the tool bar and the main toolbar.
Now, let’s discuss the act of Revo Uninstaller Pro.
Traced Programs: It shows all the Uninstallation logs of installations traced Program using Revo Uninstaller Pro. By default, when clicked, it will now open a new tab and so, the created logs will be shown in Icons and when you click on an item log, it will now show description panel bar the properties of the log like: Icon, Size, Date, Registry items and Files and Folders.
Logs Database: The display shows all the Logs from program installations as they create their installation database in the system so thereby making a series of change to the computer like the Registry files and folder. This means Revo Uninstaller Pro has its way programs are logged and so therefore, the uninstallation of the logged program will reverts all changes just as they were made to the computer during its installation.
Install Programs:  This allows the installation of programs from Revo Uninstaller Pro from the particular directory while Revo Uninstaller Pro will now log the installation process of the program into the system as it will monitor the process of installation and so create it’s Log database to help uninstallation process as it will not do the normal scanning algorithm since it has be logged.
Forced Uninstall: Revo Uninstaller Pro is rice packed with these powerful features such as the force Uninstall. This feature does nothing but helps locate and remove leftovers of programs which has already been uninstalled or incompletely uninstalled using the Windows default Uninstaller Package which means there will still be remnants of such programs on the computer. Revo Uninstaller pro force Uninstall requires just two (2) parameters to make this possible, (1) the exalt name of the uninstalled program. In the case where the entire combination of the Program name is not totally known, a semi-column (;) may be used to separate the name. (2) The full path to the program file, when it did exist. So, no mistake can be down as Revo Uninstaller Pro make sure any error in the taped location or file name will display an error message.
Uninstall: This function is actually designed to make remove programs from the computer not just as an uninstaller but this added function was built in Revo Uninstaller Pro to make it so special and easy navigate since it has a Wizard to guide. The Wizard in Revo Uninstaller Pro only create a System restore point, a do a registry backup, invoke the program built-in default uninstaller and then look for left overs of that program, then the program’s registry file. All this can be done so, one can delete them to create some more space in the hard drive.
Hunter Mode: This is tiny movable blues circle with a target which allows one to perform superior task of uninstalling programs by just dragging the Hunter circle to the Program icon on the desktop though it will result to the flay out of its own context menu for one to make do with what one choose like Uninstall, Stop Auto, Kill, Kill and Delete, Open Containing Folder, Search at Google for, Properties, Cancel. Actually, this does not just work on desktop apps only, but on opened programs or even from system try notification also.
Backup Manager: This option helps in the managing of backup information stored by Revo Uninstaller Pro after deletion of Registry entries, files and folders if the necessary options are set.
The AutoRun Manager: This feature is found in the Toolbar and it is very Unique in the aspect of managing Windows Start-up program also known as the autorun programs. A lot can be down from here since you can get information on programs Autoruning and even find the program installed location. It procedures are not different from that of the Windows Task Manager but a little more advanced. Functions like: Making not running programs Run by just selecting and clicking run.  It is also possible to Kill an already running program so that program will quite its process and also delete the process. To remove startup programs from the list of Startup list and prevent its auto startup when Windows start, also, unchecking may be the best way to do this for the program to remain in the list but not run until otherwise re-check it. Programs can also be added to auto start on Windows Startup. There are several more command you can execute here.
Junk Files Cleaner: This function allows the finding and removing of various types of junk and unnecessary files from your computer. Files that are actually leftovers from closed programs which may actually cause a chucked up hard drive.
Windows Tools: This is a very useful tool because it helps people to find it easy to get their Windows administrative Tool.
Browsers Cleaner: This here helps to eradicate trace like Web History, Address Bar History, Cookies, Temporary Internet files, etc. This feature works for the selected browser options only.
Microsoft Office Cleaner: This feature alone will make any one believe Revo Uninstaller  Pro is just design to work with Microsoft OSs to remove history of most recently used files in Word, Excel, Access, PowerPoint, etc.
Windows Cleaner:  With this tool, one can easily remove all Windows Traced history, empty Recycle Bin, delete temporary files, freeing more disk space.
Evidence Remover: Revo Uninstaller Pro comes with this sophisticated tool that will actually remove trace or permanently delete deleted files and folder from ones Hard drive or whatever removable drive forever and there will not be a single chance for it to be retrieved or traced even by professional or expensive  recovery tool.

Unrecoverable Delete: This tool is almost like the Evidence Removal but this time, one have to add the file or the location of a file to it and not actually searching for already deleted files.

To download the Revo Uninstaller Pro click here, and if you need the crack if you can not afford it, then just place your request at the comment box.

You can get the Revo Uninstaller Pro Tutorial and User Guide direct from here if you do not know how to get it from the program.